
There is the ability to add your own custom colour pallet in Alpaka.
Below are some example colour pallets which are 400px x 293px as PNG graphic files.
Right click and choose 'Save Image As' (PC) or CTRL + Click (Mac) on the image, then choose 'Save Image As' to download the below images onto your computer.
An example of a custom colour pallet with less choice and has labels:

The entire colour spectrum:

2001 theme:

Chezbourg theme:

Jacky theme:

World G theme:

You can download all of these pallets by clicking on the download link below.

If you are making your own custom colour pallet, the image file needs to be a PNG file (Portable Network Graphic file). The image size of this graphic MUST be 400 pixels in width and 293 pixels in height.
If you are not familiar with Alpaka's FILES feature, please click here to learn about the File Storage feature.
In the navigation > FILES, you will see a folder/directory named 'Images'. Click on the Images folder.

Click the 'Upload' button and choose the image file that you have prepared on your computer.
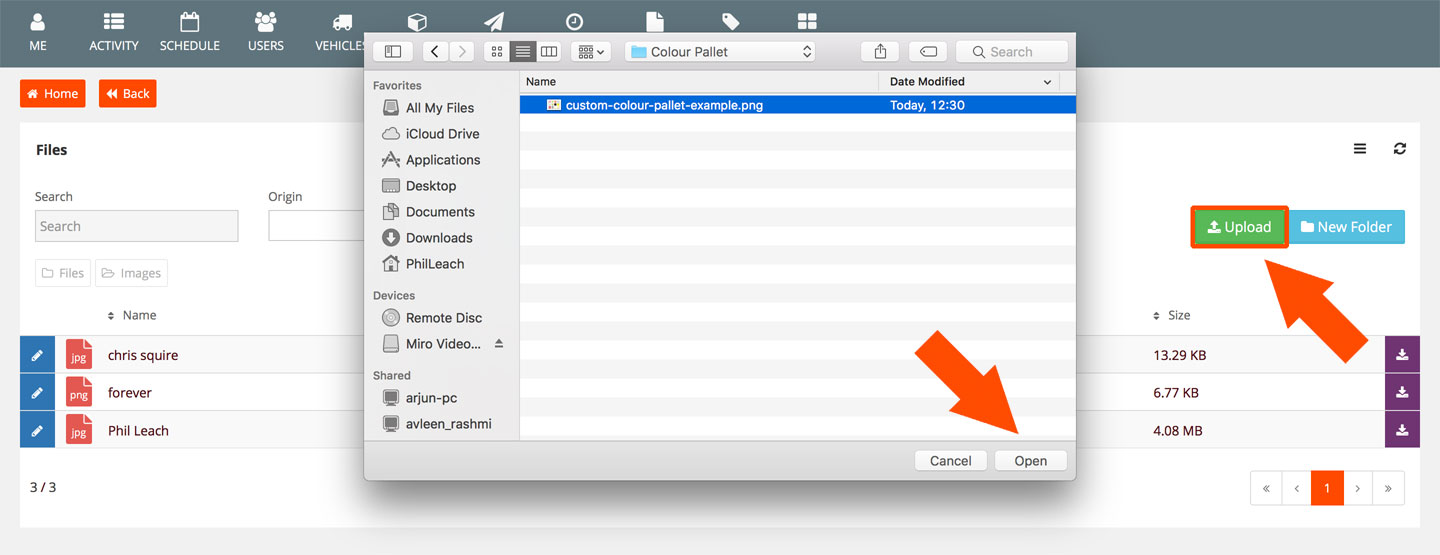
After your image has successfully uploaded it will appear in your list.

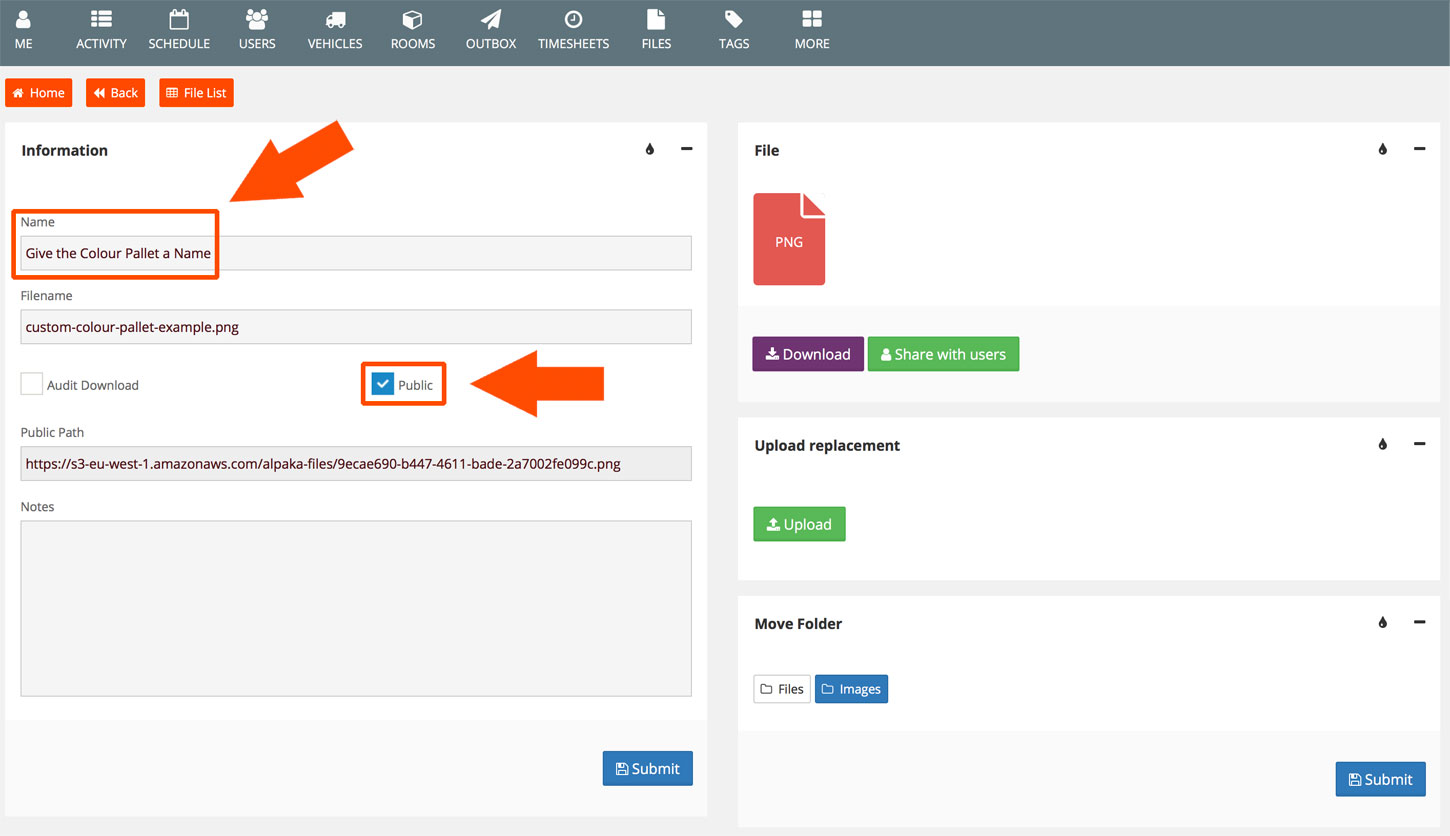
Click on the file which takes you to the file settings page.
Give your file a name (for your own reference) and importantly, make the file PUBLIC by ticking 'Public'.
In your navigation > Activity, click on the 'View Settings' cog icon in the top right of your screen.
Within the view settings pane your custom colour picker will now be available in your list.
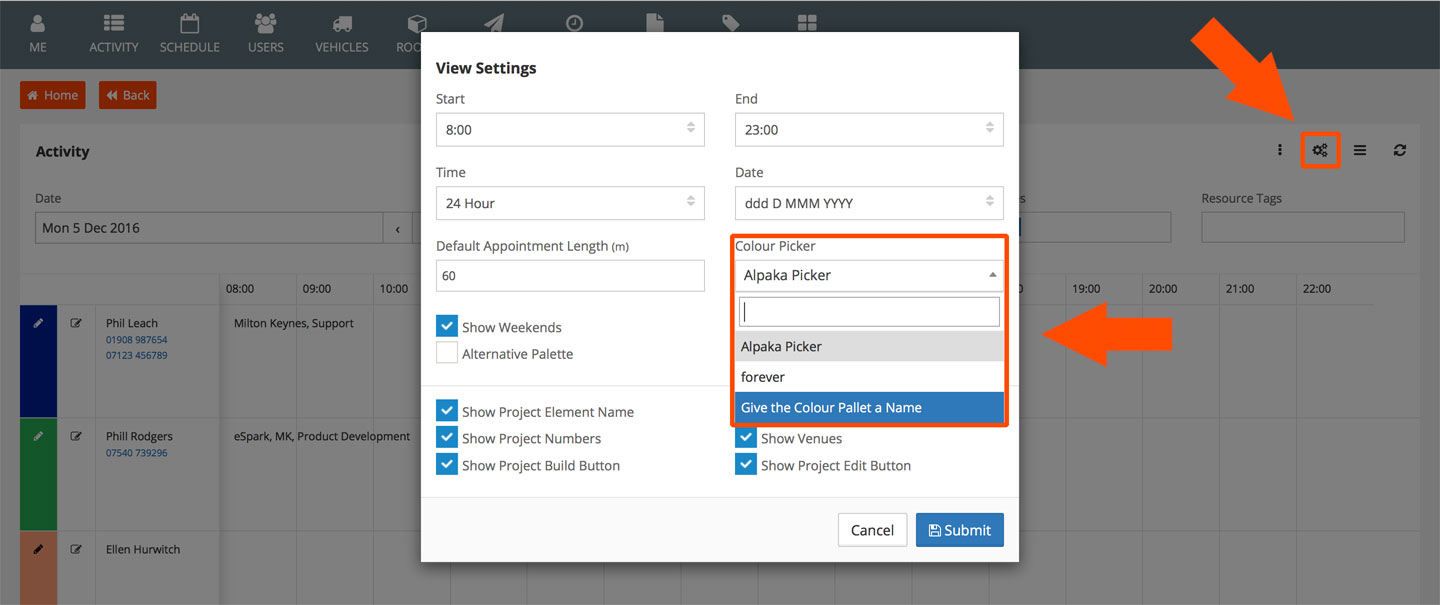
Now in every place within Alpaka that you can select a colour, it will now use your custom colour pallet.

See below video demonstration on adding a custom colour picker/pallet to Alpaka.